How to take apart primo water dispense?
Struggling to clean or fix a clog, many wonder, “How to take apart primo water dispense?” Without clear guidance, this task can seem daunting and leave you with a non-functional dispenser.
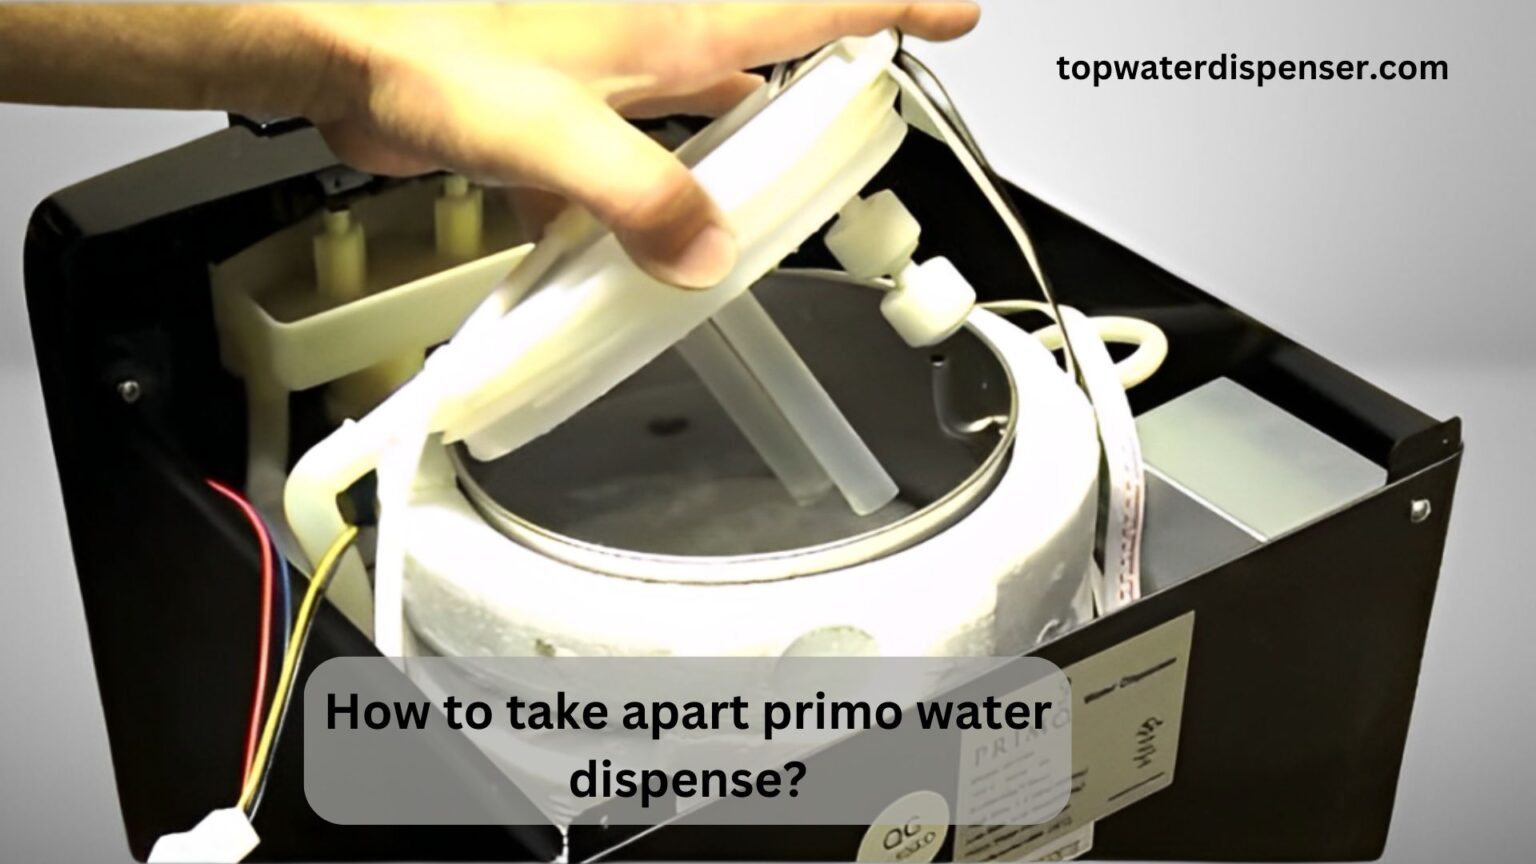
Begin by unplugging the dispenser and removing the water bottle. Carefully dismantle the drip tray, collar, and spouts, usually by snapping them off or unscrewing. Consult the user manual for specific model instructions on detaching internal components.
Discover the simple steps to dismantle your Primo water dispenser for maintenance or repair. Say goodbye to confusion and keep your water flowing smoothly—our guide makes it easy!
How to take apart primo water dispense? (7 Steps Guidance)
If you are facing the same problem like, How to take apart primo water dispense? Must read the following steps!

Step 1: Unplug and Prepare
Safety is paramount. Ensure the Primo water dispenser is disconnected from any power sources before attempting to disassemble it for cleaning or repair to prevent any electrical hazards.
Step 2: Remove the Water Bottle and Empty the Reservoir
Carefully lift off the water bottle from the dispenser. Then, drain any remaining water from the reservoir to ensure a dry and safe environment for disassembly.
Step 3: Detach the Drip Tray
Gently pull the drip tray away from its position at the base of the Primo water dispenser. If it’s held by clips or screws, use the appropriate tools to remove it.
Step 4: Remove the Collar and Spouts
Proceed by detaching the collar and spouts, often secured by a simple twist motion or with hidden latches. Handle with care to avoid breakage and keep track of any small parts.
Step 5: Accessing the Interior Components
Open the back panel or the top of your Primo water dispenser to reveal the internal components. Perform this step with caution to prevent damage to the machine’s inner workings.
Step 6: Carefully Disassemble Internal Parts
Inside the Primo water dispenser, disconnect any connectors or tubes with care. Reference your model’s manual for specifics on which parts to detach and how to do so safely.
Step 7: Reassembly Tips After Maintenance
When reassembling your Primo water dispenser, reverse the disassembly steps. Start by reconnecting the internal components, ensuring all tubes and connectors are securely fastened and aligned properly.
Topics:
The comprehensive topics related to the problem of water dispenser like,How to take apart primo water dispense?
1.Troubleshooting Common Issues with a Primo Water Dispenser
Understanding common problems—like cooling issues, unusual noises, or inconsistent water flow—is essential in maintaining your Primo water dispenser. Regular maintenance and timely troubleshooting can prevent these issues from developing into bigger complications.
2.Maintaining Your Primo Water Dispenser for Longevity
Regular maintenance is crucial for extending the life of your Primo water dispenser. Clean and inspect it frequently to prevent mineral buildup and wear-and-tear. Proper care ensures that your dispenser continues to function efficiently and provides clean drinking water for a longer time.
3.Understanding the Primo Water Dispenser Mechanism
Comprehending the Primo water dispenser’s mechanism is key to effective troubleshooting. It includes understanding the cooling system, heating elements, and electrical connections that all work in harmony to provide chilled or hot water on demand. Familiarity with these components aids in precise issue identification and resolution.
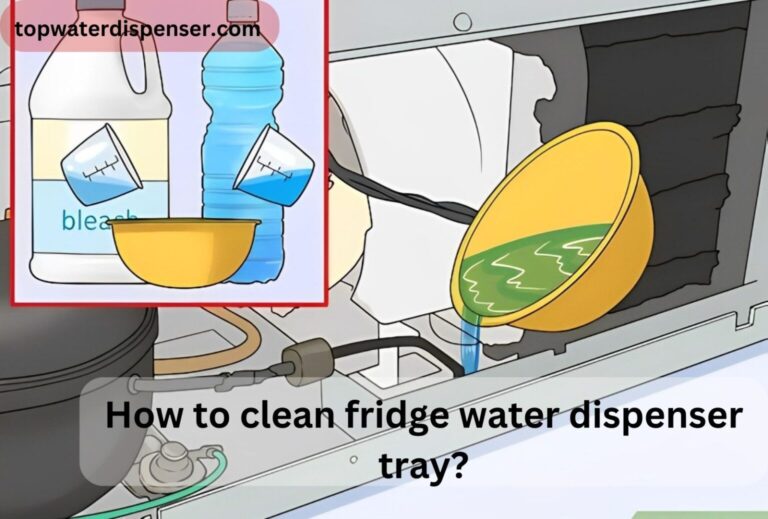
4.The Importance of Regular Cleaning for Water Dispensers
Regular cleaning is not just about hygiene; it’s a vital practice that prevents the growth of mold and bacteria, which can contaminate your water supply. Establish a routine cleaning schedule to ensure that your Primo water dispenser remains in excellent working condition, providing safe and clean water.
5.DIY vs Professional Repair: When to Call the Experts for Your Primo Water Dispenser
Deciding between DIY repair and professional help for your Primo water dispenser hinges on the issue’s complexity. Minor troubleshooting can often be self-managed with the right guidance. However, for intricate problems involving internal mechanics or electrical issues, seeking a professional’s expertise ensures safety and the dispenser’s longevity.
Conclusion:
In conclusion, learning “How to take apart primo water dispense?” equips you with the knowledge to ensure its upkeep and troubleshoot problems effectively. By following these straightforward steps, you secure both the functionality and hygiene of your device. Remember, regular maintenance is key, and for complex issues, don’t hesitate to consult a professional. Embrace the confidence that comes with understanding your water dispenser and enjoy a steady flow of pure, clean water.
FAQs:
People also ask, How to take apart primo water dispense?
To clean a Primo portable water pump, disassemble the pump, soak all non-electrical parts in vinegar, rinse thoroughly, and allow to air dry before reassembly.
To unlock a Primo water dispenser, press and hold the lock-out button or safety latch located above or on the dispensing buttons for a few seconds until it releases.
To fix a Primo water dispenser that’s not dispensing water, check for clogs in the spouts, ensure the reservoir is filled, and inspect for kinks or blockages in the tubes.
To open a water dispenser for cleaning, remove the bottle, drain water, detach the drip tray, spouts, and collar, and access the interior through the rear or top panel.
To clean the inside of a Primo water dispenser, use a mixture of water and vinegar, scrub interior surfaces, rinse thoroughly, and dry before reassembling and use.


One Comment